首先必須安裝rest framework
# install django rest framework
pip install djangorestframework
在settings.py加上rest_framework
# project/settings.py
INSTALLED_APPS = (
    ...
    'app',
    'rest_framework',
)
準備資料表
# app/models.py
from django.db import models
def Participant():
    name = models.CharField(max_length=20)
    age = models.DecimalField(max_digits=3,decimal_places=0)
    GENDER = (
        ('F', 'Female'),
        ('M', 'Male'),
    )
    gender = models.CharField(max_length=1, choices=GENDER)
初始資料表或更新時,執行makemigrations產生model.py的資料庫語言,執行migrate則會根據這份文件去建立/修改資料表。shell指令則是進入Python的互動模式去操作資料庫。
# active model
python manage.py makemigrations
python manage.py migrate
# execute python shell
python manage.py shell
# (Python Shell)add a new record in Participant
Python 3.5.2 (default, Nov 23 2017, 16:37:01)
[GCC 5.4.0 20160609] on linux
Type "help", "copyright", "credits" or "license" for more information.
(InteractiveConsole)
>>> from app.models import Participant
>>> record = Participant(name='Mike', age='20', gender='M')
>>> record.save()
serializers.py
# app/serializers.py
from rest_framework import serializers
from app.models import Participant

class ParticipantSerializer(serializers.HyperlinkedModelSerializer):
    class Meta:
        model = Participant
        fields = ('url', 'name', 'age', 'gender')
views.py
# app/views.py
from rest_framework import viewsets
from app.models import Participant
from app.serializers import ParticipantSerializer

class ParticipantViewSet(viewsets.ModelViewSet):
    queryset = Participant.objects.all()
    serializer_class = ParticipantSerializer
url.py
# project/url.py
from django.conf.urls import url, include
from rest_framework import routers
from app.views import ParticipantViewSet

router = routers.DefaultRouter()
router.register(r'participants', ParticipantViewSet)

# Wire up our API using automatic URL routing.
# Additionally, we include login URLs for the browsable API.
urlpatterns = [
    ...
    url(r'^api/', include(router.urls)),
    url(r'^api/api-auth/', include('rest_framework.urls', namespace='rest_framework'))
]
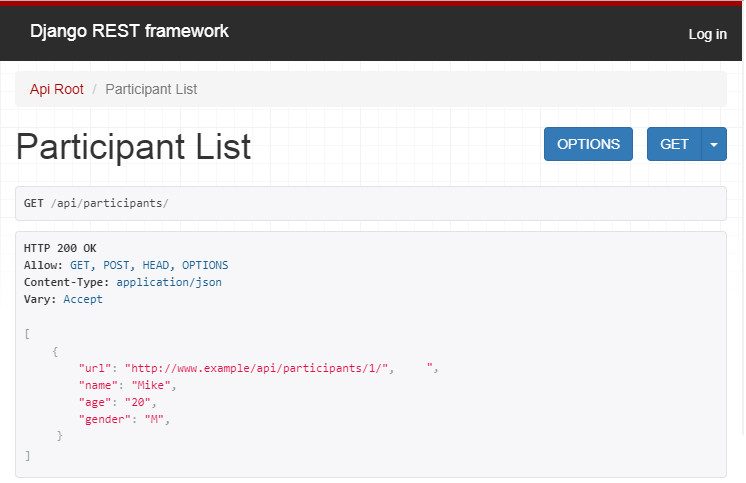
接著就可以在瀏覽器上確認API有沒有正常運作。
URL- http://www.example.com.tw/api/
URL- http://www.example.com.tw/api/participants/
URL- http://www.example.com.tw/api/participants/1/
我們能夠透過設定權限,防止資料被任意串改,在登入的情況下才能新增/修改/刪除,其他僅能取得資料。
# app/views.py
class ParticipantViewSet(viewsets.ModelViewSet):
    queryset = Participant.objects.all()
    serializer_class = ParticipantSerializer
    permission_classes = (permissions.IsAuthenticatedOrReadOnly)
或是
# app/views.py
class ParticipantViewSet(viewsets.ReadOnlyModelViewSet):
    queryset = Participant.objects.all()
    serializer_class = ParticipantSerializer
URL- http://www.example.com.tw/api/api-auth/login/
右上角點選「Log in」,輸入帳密後才有修改的權限。
參考資料:
http://www.django-rest-framework.org/tutorial/quickstart/